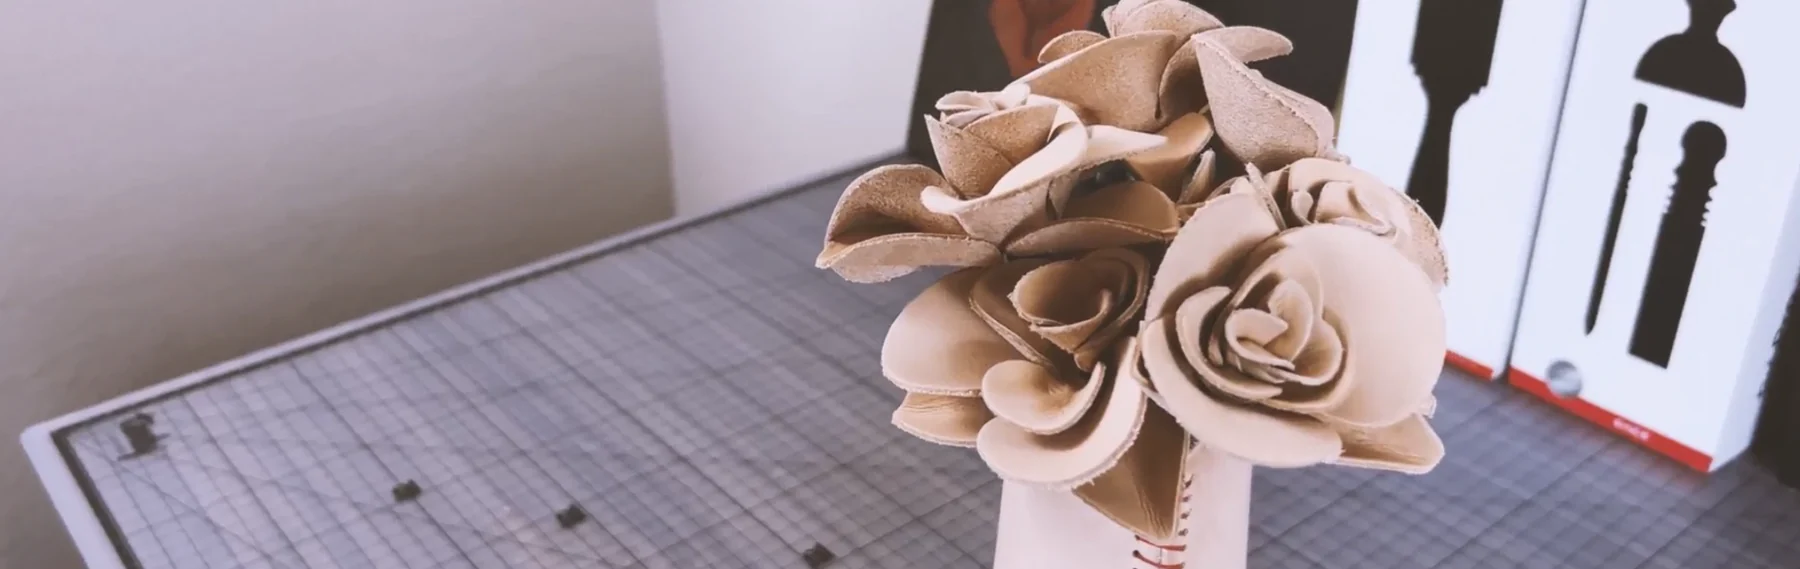
Transform your space with the charm of handmade leather roses arranged in a stunning vase, adding a touch of elegance and warmth to any room. Whether you're a seasoned crafter or a beginner looking for a rewarding project, this tutorial is designed for everyone.
In this step-by-step guide, we'll walk you through the process of creating lifelike leather roses from scratch. Learn the essential techniques for cutting, shaping, and assembling the petals, and discover the secrets to achieving a realistic and beautiful finish.
But the creativity doesn't stop there! We'll also show you how to craft a stylish leather vase to complement your floral arrangement. With a few simple materials and our expert tips, you'll be amazed at the professional-looking results you can achieve right at home.
Download written instructions for roses by clicking here. For bonus leather vase pattern download click here. Download the rose petal pattern by clicking here.
WHAT YOU NEED
To start, you'll need to get one "6 Pack of Clicked Blank Roses". The kit includes all the leather needed and six floral wires. You will also need rubber bands, spray bottle or dye, floral tape and needle nose pliers. We also recommend paint, stamps or other customization tools you prefer.
INSTRUCTIONS
1. Bend and fold the tips of the wires to create a small "knot" at the tip to hold the leather petals in place.
2. Case the leather petals and give 3-5 minutes for the water (or dye) to saturate the leather entirely.
3. Slide the petals up the stem, through the hole in the center and form them, using rubber bands to secure each layer as you go. For the final row, form the leaves into a "V" shape, and do not rubber band. Allow to completely dry.
4. If you have floral tape, push the petals up the stem as far as possible and use the tape to wrap below the final row, to secure them in place.
Optionally, if you find the rubber bands are too noticeable, you can snip them out at this step.
5. Arrange the flowers in a vase of your choosing and enjoy! If you would like to make this leather vase, scroll up to download the pattern and follow along for the instructions as follows!
TO MAKE THE VASE
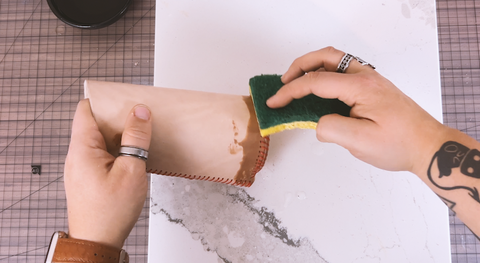
You will need approximately 12"x12" piece of leather. You can use any weight that's 3oz or higher, but you want to make sure it's stiff and will hold it's shape when sewn together. A 4-6oz veg-tan would be a great option and easy to work with. You will also need needles and waxed hand sewing thread, hole punches with mallet or a rotary punch and box cutter or leather scissors.
INSTRUCTIONS
1. Prepare your leather, by taping down your pattern and rough out the material cuts.
2. Punch the holes with a drive punch or rotary punch, as indicted by the pattern.
3. Cut the pattern out on the lines.
4. Start sewing! You can use a whip stitch, as is shown in the video, or an x stitch, box stitch, baseball stitch, etc. Text a few and see which you prefer!
Optionally, you can wet form the base if your stitch type doesn't line up exactly.
CONCLUSION
Whether you're looking to spruce up your living space, surprise a loved one with a unique gift, or simply unwind with a creative project, making leather roses with a matching vase is the perfect choice. Join us on this crafting journey in this step-by-step video, and let's turn simple materials into a masterpiece together.
All Leathercraft Library patterns and projects are property of Tandy Leather. Projects and patterns available are a part of the Tandy Leather Archive and may contain outdated product information or service offerings. Projects and patterns can be reproduced for personal use by printing, but Tandy Leather cannot guarantee the quality of reproduction or printing due to the image quality available. Some project and pattern themes or motifs may not be representative of Tandy Leather’s current views.